DIY all Natural Bronzer

This is the one of the most amazing diys that I have ever done. Its natural and should normally last till the shelf life of these respective ingredients.

Something to keep in mind though is that not all natural ingredients could be suitable for every skin type. Everyone has different skin type and sensitivity levels, so try on a small area first.

Ingredients:

1/2 tbsp cornstarch
1 tbsp cinnamon powder
3/4 tbsp cocoa powder. 100% cacao is the best thing to use.
(I have even tried making with coffee and it works too!)
Note: Measures are not exact, so try and work around your skin tone.

Here is the video on me making this bronzer and demo.


Optional Ad ons:

Nutmeg powder if added can give a sunkissed brown shade.
You could even add hibiscus powder for a pinkish hue add on.
Few drops of your favorite essential oil or body lotion could actually bind it all together.

If you want to make bronzer for dark skin, you might want to use more cocoa powder. For more match to lighter skin use more cinnamon powder. For olive skin tone, I love to use both cinnamon and cocoa powder almost in the same ratio.

Recipe:

With cornstarch as your base, add other ingredients and mix well. And this is ready to use.
Store in a clean airtight container.

Thats it! So easy and works perfectly. Hope you make it and let me know how it turns out. If you have any queries you could leave it in the comment box down below.

This is not a sponsored post.

With Love

Ssilky Dhillon
Let us treat our natural selves, with what nature has to offer.


DIY Amazing Arabian Wax | Sugaring Tutorial and Demo

Arabian Depilatory wax or Sugaring or Persian wax is an easy diy and is all Natural. I am totally in love with it! It has certainly taken few trial and errors but has been so much worthit! So, I am really excited to be sharing this video and blog on making 'sugar wax at home' and actual 'demo' with you.

Arabic wax dates back to centuries and is an effective, less painful way to remove hair. It is a type of sugaring but does not use any stripes to remove hair. Most Egyptian, Indian or other Asian hair removal techniques use cane sugar as a main ingredient to remove unwanted body hair. The process is gentle and the results are long lasting.

Pic: Sugaring demo

You will need:
1 cup cane sugar
(use ground sugar as granulated can become difficult to work with)
1.5 tbsp lemon juice
1tsp seasalt
2 tbsp water

Nonstick pan, something to stir (spoon), marble surface or glass/ceramic plate placed over a dish of cold water and plastic bag to store the wax.

Note: Lemon or vinegar is used to avoid crystallization of the sugar liquid.

Prepare the setup:
Before cooking, have the setup ready. On your marble surface or glass/ceramic plate pour few drops of water and spread evenly. If using glass/ ceramic plate. Have a pan filled with chilled water and place the plate over it. Then pour few drops of water over it, this will prevent sugar syrup from sticking.
Have a bowl filled with water as we will need it later.

Recipe
Mix all contents in a nonstick pan and let it simmer over medium heat. Keep stirring till you reach a golden color and a syrup like consistency. Turn off the heat/burner. Slowly pour over marble/glass or ceramic surface.  Taking the spoon play with it towards the corners and work your way to the centre. This will give it some time to cool down.

Slowly the syrup with start becoming dense. Let it rest for 30 secs not more. Take some water from the bowl we had kept aside rub between your palms. Now carefully (as it is hot)  gather in between your palms.

Keep adding little water (just few drops in your palms) and knead and stretch till it becomes supple. You will notice a change in color as you keep stretching. When supple, it should be ready to use. Yay!!

It might sound tiresome, but once you get the hang of it, its very easy.

Watch my video below for full details on making and demo.


CAUTION-  It can be really hot, so be careful. If you are a kid or teenager, take permission from your guardian and have some adult supervise you. 
Always test on a small area first, as all of us have different skin types and allergies.

How to Use:

It can be used two ways and the most efficient is the second way that I have mentioned below.
1- Taking a small amount from the wax we prepared and spread it in the direction of hair growth applying even pressure. And swiftly remove against the hair growth. Use water to clean the area.

2- Mostly sugaring paste is applied in the opposite direction of hair growth and removed in the direction. Initially you might find it hard to work this way because the way only works good when you go really slow and le t the sugar sit before removing. I have tried that too and results are far better that way in terms of less damage hair follicle damage and hence less or no ingrown hair.

Storage:
You only need a small amount to work with at a time,  so once it has cooled down, roll the remaining into a ball and store in a plastic bag or any airtight container in refrigerator. 

When using again, microwave it for no more than 5 seconds or leave at room temperature (depending on the geographical conditions you stay in), till it becomes of the initial consistency we first used at.

Benefits:
It is all natural with no harmful preservatives or hormone disruptors as might be present in some commercial waxes.
Results should last more than 2 weeks depending on your hair growth.
Removes even those tiny hair
It is definitely economical
Skin is left really smooth and soft after it
Could be used on most body parts (note - it depends on your skin's sensitivity in that area)

If you have any questions, you can leave that in the comment box below and I would try my best to answer them.

 And hope you will give it a try and enjoy silky smooth skin. :-))

This is not a sponsored post.

With Love

Ssilky Dhillon
Let us treat our natural selves, with what nature has to offer.

Follow this blog
Subscribe to Ssilky Dhillon on Youtube
@ ssilkydhillon on Twitter 


DIY Sonam Kapoor Inspired Waterfall Braid Hairstyle | Dheere Dheere Se Meri Zindagi song

Now, watch this song Dheere Dheere if you haven't already and Sonam Kapoor just wears this beautiful hairdo all through the song. I am in love!

That's the beautiful waterfall braid I saw her wearing twice in the song - once a single braid and at the end a set of three waterfall braids. So, I had to recreate my version of the hairstyle. I wanted it to be such so that anyone could do on their own.
Sonam Kapoor Inspired Hairstyle Look
Dhere Dhere Inspired Hairstyle Look

Mostly, it becomes difficult to execute a similar look when you 'do it yourself' without help of someone else. So, I tried and came up with this look here.

This is my take on the beautiful waterfall braid. I just loved how it turned out so I made this tutorial. Below is the link to my video tutorial.


This could be worn both casually and for special occasions. I love the fact that it is easy and does not take much time. Hope you will have fun with this look. Which is your current go to hairstyle?


Got Teased! Victoria Secret Noir Tease Perfume Review

It is such a misty day Today here in the city. Fall is round the corner and this reminded me of my favorite picks this season.

The 'Tease' perfume by Victoria Secret. I am totally in love with it. It is such a warm flowery fragrance and I can easily wear it throughout the day. The evenings are getting chilly and it feels like a warm hug. And, I am totally teased and obsessed!

Noir Tease by VS

The best part about this is that even with those floral notes it is not overwhelming.

It stays strong for a good 4-5 hours. Ah!.. how I wish if it could last little more. Haha! honestly even after long 8 hours I could still smell it.

The bottle and package has little girly details, especially that lace impression is to die for. 

Noir Tease by VS

Some people say they get problems with that automizer, but personally it has been good for me.

I purchased it over a deal where it was full priced of dollar 68 for the 100 ml bottle and came with a free body lotion of the same 'Tease' scent. This body lotion normally retails for 20 dollars. So, this was a good bargain.

Noir Tease Body Lotion by VS
Other details:
Fragrance has notes of black vanilla, frozen pear and floral gardenia
Comes with a separate cap for travel ease
Is available in 100 ml and 50 ml

So, like a queen puff the fragrance and 'tease' the sense of smell with a feminine note. Would love to know which perfume has been your favorite for the season.


A makeup look for all Dreamers!

"A dreamer she was!"

They say for dreams to come true, you have to dream! Have faith in your dreams.


With this look bring those dreams and your inner dreamer to life. Use your favorite colors and have fun with this look.

Like I chose a fuchsia pink shade, let me know of that one highlighting color you would choose for this look.  

This is not a sponsored post.

With Love

Ssilky Dhillon
Let us treat our natural selves, with what nature has to offer.

Follow this blog
Subscribe to Ssilky Dhillon on Youtube
@ ssilkydhillon on Twitter
@ssilkydhillon on Instagram


How to grow long Eyelashes Naturally - My story!

So, I have pretty decent lashes, I would say towards being on longer side. I have had them like this since my childhood. That is the reason I was unsure about making this post inspite several requests.

And then I thought why not! I have been doing so many things which have helped my eyelashes be long. Though they were not my delibrate attempts, still they helped.

I was unsure to make this post until last week. Past few months, I saw that my eyelashes reduced to half of their original length. It was clear to me that my regular mascara, eyeliner and other cosmetic products had to be the cause. Still! it was not a concern about my eyelashes but about my dry skin all thanks to so much travel that I started applying oils over my skin.

Pic: Eyelashes now! Almost back to original length. Still more work needed.


Oils I used: 

I used to use almond oil, petroleum jelly and so many other oils over my face since I was a teen. I started doing that again. And yes the results were awesome! I had also read somewhere that oils and petroleum jelly is even good for your eyelashes.

The results were clearly visible and my skin was not that dry now and rather shiny. I had used it all, some days Almond oil, some days Coconut oil, and other days Apricot oil. Very few days but I even applied extra virgin olive oil. Also because I was into swimming this past month that I had to take extra care apart from the regular moisturizers.

I have a dry skin so apply it over my skin and I do not get any breakouts. But if you are sensitive or allergic to any oils or if you have an oily skin and do not want to use oils for your face - just use it for your eyelashes. In future I will try it out applying separately to my eyelashes as well.

Oils known to help eyelash growth:

Here is the list:
(If your skin is sensitive to any of the oils, do not use it.)

1. Castor Oil
Castor oil is used for growing eyelashes, eyebrow hair and hair in general. It has anti-bacterial and anti-inflammatory properties.
2. Coconut oil (add a few drops of lavender essential oil)
Coconut oil is good for moisturizing and acts as a good carrier oil.
Recipe here
3. Petroleum Jelly
It gives it that extra moisture to grow.

There are so many serums available in market nowadays. So, do your research and see what works for you.

How to Use:

The way these have to be applied is either using an eyeliner brush or simply a q-tip. Just apply it with q-tip or eyeliner brush over your eyelids focusing on the roots of your eyelashes.
For details click here.

My results:

Here is my video on the same blog post where I tell you how I have grown my eyelashes back to being long in a month.


Back in my head I knew the oils I was using could be helpful for my eyelashes as well. But as I was more worried for my dry skin that I applied it all over my face. And this month I noticed that my eyelashes were back to being normal. I can credit this to these oils as I believe while applying over my face, some amount was even applied to my eyelids and hence my lashes.

And now I can relate since my teen days I moisturize my face a lot and that could be the very reason that I have maintained them. I know that not each one of us have long eyelashes. But taking care really helps! So, I am mentioning here the oils that are known to help eyelashes grow. In the end of this blog I would provide link to some blogs and videos on eyelash growth.

Other beneficial tips to have Healthy Long Lashes

1. Avoid Mascara and instead go simply without anything or just curl your lashes using eyelash curler
2. Go for a more natural version of eyeliner. Either a pure natural Kajal or as we need to have waterproof eyeliners try to go for the one with least chemicals.
3. Always remove your eye makeup before sleep.
4. I wash my eyes a lot, that I feel helps the skin be more moisturized and also aids in eyelash growth.
5. You guessed it! Having a good diet. This comes up everywhere and is so true. So, have your protein and vitamins.

I hope these tips help some of you. Also, if you have any tips that you would like to share, please mention them in the comment box below. Sharing is caring!

Some useful links:
Eyelash Growth Serum Recipe by Wellnessmama.com
3 ways for Longer Eyelashes by Healthextremist.com
Grow Eyelashes youtube video by Farah Dukai
How to make Kajal for eyes at home by makeupandbeauty.com

This is not a sponsored post.

With Love

Ssilky Dhillon
Let us treat our natural selves, with what nature has to offer.

Follow this blog
Subscribe to Ssilky Dhillon on Youtube
@ ssilkydhillon on Twitter
@ssilkydhillon on Instagram


2 min messy bun - rescue for bad hair days

This hair updo is my favorite for those lazy days or when I am having a bad hair day

It literally takes no more than two mins and is my go to hairdo this summer.

Pic: Top knot / Messy Bun

All you need for this messy bun is - a rubberband matching your hair color, hairbrush and some bobby pins.

Start by making a high pony tail. Stop kind of mid way to leave an extra strand of hair.

You should have sort of a bun, tighten it with the rubber band. Now, take the extra strand and wrap it around the rubber band. Spread your bun for volume and bring it forward. Pick up few strands at a time and tuck them inside the rubber band (by moving them towards the back side of the bun). You could even use bobby pins for extra hold. Play around till you like the shape and style of your messy bun.

Take the side strands towards back of your bun as well and secure them with bobby pins. Give your bun a final spread.

As much as I like this messy bun for an easy everyday hairdo, I equally like it for any last minute calls to some occasions. I just like to make sure that if I am to be attending a party or any such occasion, that my bun is secured with bobby pins. I give it some extra time making it all upto my liking and yes have got many compliments for it.

So, I hope you enjoy recreating this just the way I do. I would love to know from you guys in the comments about your favorite go to hairstyle.

This is not a sponsored post, these are my real life choices.

With Love

Ssilky Dhillon
Let us treat our natural selves, with what nature has to offer.

Follow this blog
Subscribe to Ssilky Dhillon on Youtube
@ ssilkydhillon on Twitter
@ssilkydhillon on Instagram


DIY Sea Salt Spray for Amazing Beach Waves

Its been a while since I posted in the Hair section of my blog. Those of you who watch my youtube videos or are following me on any social media know that I am absolutely like an hair addict. This does not mean I am a pro at hairdos and all but rather that I like to do things to my hair as I have like fine and the least manageable hair (at least in my opinion, and yes I am sure of that!). That is why I love all the things that I could do haha! and love it even more if these things come out to be easy and natural recipes.

I still cannot believe how I skipped blogging about this DIY Sea Salt Spray I made, when its so quick and easy to do and has amazing results.

Its literally just two ingredients, water and salt! Yes, thats about it.

I used 1/4 cup of warm water and 1 tsp sea salt. Put both these ingredients in a spray bottle. Give it a good shake. You could also use hair gel for extra hold (optional). Spray it on your hair.

From here keep scrunching your hair or twist it into a bun (recommended if your hair refuses to go into curls easily). Both ways you should end up with lovely beach waves within an hour. For drying either go overnight (this will give tight curls) or for waves that I love, I simply let it in buns for half an hour. While you are letting it sit in buns, you could even use blowdry to speed up the drying process. After about half an hour I open up the buns and sit in front of a fan and keep scrunching my hair for next 15-20 mins (whatever time your hair takes to dry).

Watch my full video tutorial here:


Hope you enjoyed! Let me know  in the comments if you would want to recreate it.

This is not a sponsored post, these are my real life choices.

With Love
Ssilky Dhillon
Let us treat our natural selves, with what nature has to offer.

Follow this blog
Subscribe to Ssilky Dhillon on Youtube
@ ssilkydhillon on Twitter
@ssilkydhillon on Instagram

DIY and How to Remove Makeup with simply Cloth! All Natural Makeup Remover / Eraser

Chemical free beauty hacks are my all time favorite things to do.  So, I am sharing here how I like to remove makeup. I use a soft gentle cloth that looks like a towel but is way more soft and gentle when it comes to your skin.

I got this one as a gift from a friend. Well,  it was meant to be used as a cleaning cloth for laptop, glass, refrigerator and such stuff, which it works great on but it is way better as a makeup remover, trust me! And I got these many in different neon shades.

One day I simply washed my face as a first step to remove my makeup and almost forgot I had makeup on, accidentally grabbed that cleaning cloth instead of my towel. And all my makeup was literally erased. I couldn't believe that something like this was possible. Since we girls know how much we struggle especially for that eyeliner to get off. The same week I saw promotions of makeup eraser fabrics all over instagram. And I was rest assured, that the one I own has to be doing something similar. Ever since, I have continued using the ones I had. On one of my trips though, I just happen to forget mine. Huh! my bad! And I was left with using coconut oil as my best possible natural alternative to remove makeup. As you can tell by now, I am not a big fan of unnatural chemical formulations that are in many drugstore makeup removers. So, coconut oil or baby oil works fine. I am not at all trying to say that the commercial ones do not work or are bad for skin, instead going as much natural as I can is my personal preference.

Here is a quick video with how I use it, if you are interested.

Video: No Chemical Makeup Eraser/ Remover

I have a dry skin so even scrubs are little harsh on my skin. So, I use the same cloth from the side which is more like a towel as my exfoliator. Now that I forgot mine over that trip, I had made up my mind to buy the ones available commercially. Good for me that I found a similar fabric/cloth hanging around my house well in time. I am again happily using this technique without having to buy. But if you wish to buy, here are some links to brands that sell these fabric makeup removers, I might as well buy in the future. These for sure must be more professionally built than the one that I use.
Makeup Eraser - amazon.com
Wonder Cloth - amazon.com
Magic Mitt - janeiredale.com

Whatever or not you decide to buy, this is a must try product. I use it over my face after dipping in warm water.

It is very economical and can be used again and again. I am using mine from past four months now and still no signs of damage. And it can be easily rinsed clean in water with simple detergent/soap and no stains remain.

This is not a sponsored post, these are my real life choices.

With Love
Ssilky Dhillon
Let us treat our natural selves, with what nature has to offer.

Follow this blog
Subscribe to Ssilky Dhillon on Youtube
@ ssilkydhillon on Twitter
@ssilkydhillon on Instagram

How I Avoid Eating that Extra Bite & Workout !

This is a different post than the ones that I do and I see no reason why I should not be sharing this. I love working out and eating all healthy. But at the same time I dread it. I know I am not alone and its with many of us.

Procrastinating can be your biggest enemy when trying to achieve your health goals. There is one thing that I remind myself of when this happens to me is that "I am going to feel happy afterwards". This pushes me to workout every other day. This even helps me when I want (and the same time don't want) to indulge into that extra bite! Umm!.. the very moment I want to eat it all but once I listen and follow my inner voice "my body does not need it", I feel like an achiever.


Whenever now I know that my body does not need that extra bite of dessert or that I am not hungry, I simply stop. I drink water or just start doing something else and within minutes I am bound to feel that it was the right decision. Listening to the body most things can be done. Its a close observation. So, whenever that craving jumps in, catch hold of yourself and ask do you actually need it? It is a habit but is a good one to have. Hope it works out for you like it does for me.

Here is a link to my favorite youtube channel for working out -  XFitDaily.  With the videos they have over their  channel, I always feel the burn right away in whatever area of my body I decide to work on that day. Do check them out.

Let me know in the comments if you liked this post and would like to see such posts.

Happy Summer!

This is not a sponsored post, these are my real life choices.

With Love
Ssilky Dhillon
Let us treat our natural selves, with what nature has to offer.

Follow this blog
Subscribe to Ssilky Dhillon on Youtube
@ ssilkydhillon on Twitter
@ssilkydhillon on Instagram


essence of beauty Body Mist Review, FOREVER PARIS

Hello in this Spring

I am back in the States after a lovely trip to India. After official announcement of spring last week,  it is now that my city is starting to experience pleasant and warm weather vibes.

With spring approaching, I was looking out for a mild mist to go on with me full day. It was during this hunt that I tried a tester of this body mist in a CVS store and fell in love. Essense of Beauty is a CVS brand and they have various fragrances. I picked up 'FOREVER PARIS' fine fragrance body mist. 

I am so far liking the product in terms of the flowery fruity smell and that it lasts. I could smell the fragrance even after 4-5 hours. This is more than what I expected out of the product.


Forever Paris by essence of beauty

I definitely smell some Romance, that is what the word Paris stands for me. There is a smell of decadent Parisian roses, tulips and notes of strawberry that is evident. Essence of Beauty describes the scent as being delicate, light with lasting fragrance that is soothing to skin. And that is how even I would go about describing it. 

I have read some reviews stating that The Body Shop mists are better off and that the smell is similar to their Paris Amour fine fragrance mist. Personally I have not yet tried it. If anyone of you have tried, comment below telling me if  it is similar or better. 

I got a 2 oz bottle for myself. It comes topped with a spritz pump. It is also available in other sizes. 

Price and Sizes:
$6.99 for 8 oz., 3 for $ 15.00, $ 2.99 for 2 oz., 2 for $ 5.00

Also Available online at CVS website.

Ingredients:
sd alcohol 40-b, water, fragrance, aloe barbadensis leaf juice, zea mays (corn) oil, retinyl palmitate, ascorbic acid, cholecalciferol, cyanocobalamin, panthenol, tocopheryl acetate, benzophenone-4, propylene glycol, tetrasodium edta, red 33 (ci 17200), yellow 5 (ci 19140), blue 1 (ci 42090).

Pros:
Light and refreshing fragrance
Love that it has some natural oils and juices.
Not tested on animals
Available in travel size 
Could smell its traces even after half a day
Easy to apply spritz bottle
Its Pink! the colour 

Cons:
It lasts but is most fragrant only till about one hour of application. It could be slightly smelled even after hours.

I would recommend buying the product this season. Happy Spring!

This is not a sponsored post. 

With Love
Ssilky Dhillon
Let us treat our natural selves, with what nature has to offer.

Follow this blog
Subscribe to Ssilky Dhillon on Youtube
@ ssilkydhillon on Twitter
@ssilkydhillon on Instagram


Suncote Gel Sunscreen Review

My brother suggested me this sunscreen while I am on my trip in India. I am amazed by how easily this glides over the skin. So, here is my quick review for this must have product.

My skin type: Normal to Dry skin


Pic Suncote Gel & Ingredient list (back packaging)

Pros:
Spreads easily over skin
Has a soft feel
Is non-sticky
Pleasant smell (addictive - love it!)
Has a mild yet lasting fragrance (2-3 hours)
Is not a white thick liquid and a pink and less dense instead
Helped for not getting tan
Does not leave any white cast
It is non comedogenic
Felt moisturizing on my skin
It is suitable for oily, acne prone and sensitive skin too
Absorbs well in the skin


Pic: Before and in process of application

Cons:
Washes away in water
I got it from a pharma store rather than a cosmetic one. I have not yet seen it at a cosmetic store yet.

Where to buy:
Available at pharma stores
Also available online at angooor.combuydrug.in  and clickoncare.com

Maximum retail price in India: Rs. 299

Other Info:
Marketed by Curatio Healthcare Pvt. Ltd.

My final take on it is that I love the smell, the color and how lovely is the product in gliding over the skin. Will buy it again.

This is not a sponsored post. 

With Love
Ssilky Dhillon
Let us treat our natural selves, with what nature has to offer.

Follow this blog
Subscribe to Ssilky Dhillon on Youtube
@ ssilkydhillon on Twitter
@ssilkydhillon on Instagram


Loreal go360°Clean Anti - Breakout Facial Cleanser Review

Recently I had been travelling a lot and was in desperate need of a good cleanse. I wanted something that could be used at home without me having to visit a beauty salon. On suggestion of my sister I bought Loreal 360 Degree Facial Cleanser. 

Loreal go360°Clean Facial Cleanser

It has salicylic acid as its active ingredient. This makes it great for acne prone skin. Offcourse it can be used otherwise too for a general cleanse like I did.  Also I loved that it has some peppermint extract as well which makes it antifungal. This is what skin needs especially after travel.

The best part for me was a soft rubber scrublet cleanser disk that came along with it. It is not at all harsh to the skin so my skin was not left dried out or injured.

                                                                             Pic: Scrublet

How to Use:
On a wet face apply product and use the scrublet in circular motion. Avoid contact with eyes. (see pic below for more).
To finish off I used a moisturizer as I have a dry skin.

Ingredients
Salicylic acid (active ingredient):
exfoliates gently and unclog pores
penetrates into pores and eliminates any clogging residue which might cause acne

Peppermint leaf extract:
anti-inflammatory and antifungal

                                                                      Pic: back packaging

Results after first use:
Skin felt clean
Removes dead skin cells.
Moisturizer that I applied was well absorbed by my skin.
So it felt very smooth.
Also worked on blackheads a little.

Other Benefits
Can be used twice daily
It comes in many variations including sensitive skin, exfoliation and facial cleanser.

Only Con that I felt is that I felt the scrublet is better than the product itself. Not that the product is not good. This simply means I can even buy it just for that cute little scrublet. *laughs

Caution:
The back of the packaging says if used with any other skin medication at the same time it can cause skin dryness. 

Price in India:
Rs. 399

Where to buy:
We bought it from a local beauty store in India.
You can buy it online here (in India)

Overall I am happy with the product and would rebuy.

This is not a sponsored post. 

With Love
Ssilky Dhillon
Let us treat our natural selves, with what nature has to offer.

Follow this blog
Subscribe to Ssilky Dhillon on Youtube
@ ssilkydhillon on Twitter
@ssilkydhillon on Instagram


Make your Own Makeup. DIY!

I had been trying to make some combinations for my foundation powder and reading about commercial production of cosmetics. Before the factories came into being, everything was simplified and natural. There are so many chemicals in the commercial makeup. If you have to wear it everyday it can take a toll onto your skin. With this idea, I saw this post and exactly found out what other ingredients I could use to add over in my recipe. With this I am sure to find perfect shade for my Diy Foundation Powder.


Let me know in the comments what you think of it? Let us together try it out and share our progress on the way.

This is not a sponsored post. Affiliate links available.

With Love
Ssilky Dhillon
Let us treat our natural selves, with what nature has to offer.

Follow this blog
Subscribe to Ssilky Dhillon on Youtube
@ ssilkydhillon on Twitter
@ssilkydhillon on Instagram


love&beauty by Forever21 Eyeliner Review

I ran out of my black eyeliner and it was the very day of Cyber Monday last month. Juts like last year, this year too Forever 21 had an online shopping and free delivery deal on shopping worth of any price. Now, I was not particularly searching for my eyeliner on their website. Still, when it was there in one of those related items list I suppose, I thought to have one for myself just as a back up. I ordered a black brown shade. I even mentioned it in my haul over my youtube video. Its linked here.

When the package arrived and I opened the liner and glided it over my wrist, I almost fell in love. It is the color and mostly I am in love with how sturdy is the material of which it is made of. Well, I am not talking of the packaging which is alright but of the actual liner. Also very impressive was its very nib which was kind of pointed and well in shape. I loved how pretty my winged eyeliner turned out because of this fact. I almost forgot to mention this point in my haul video. This thing and how unexpectedly the product impressed me, is the very reason I am writing this little blog post over it.

love&beauty. Smooth Eyeliner in Black Brown

I have used other roll on liners, which we all have might have at some point. The drugstore ones from Revlon, Maybelline, Loreal and so on. A thing that I have noticed in most is that, whenever I am applying these gel eyeliners over my lids, they tend to breaks so often, some a little more prone than others. No wonder they glide smoothly, and I carefully use them not to break them and some still do. Well, I am not complaining and love all of these liners. Also, it can be that its just a case with me. All I mean to say here is this, I literally was not expecting the liner from Forever 21 to turn out so good, especially when there were no product reviews on website while I was ordering. This product is worth mentioning. This is my first time trying Love & Beauty cosmetics, possibly some of you already using it and like it.

Retailing at $1.90 and with ingredients like hydrogenated coconut oil, it is a good quality must have.

                                                                        Ingredients (Back cover)

I am definitely going to rock it. Here are some of my pros and cons, which I like to mention at the end of my review.

Pros:
Not tested on animals.
Easy to apply tool (works easily for winged liner)
Sturdy liner material
Smooth application
Comes in both black and black brown
Perfect nib for creating that sharp wing
Though the the product did not mention on packing, it does not smudge in water, I tried! (below is the pic)
One of the main ingredients is hydrogenated Coconut Oil.
(For me any ingredient closer to being natural is always a Big Pro. Hydrogenated coconut oil has Skin Conditioning properties)
Lasted the whole day for me without smudging.
(That has to do be with the synthetic Beeswax used in the product)
Below is a pic captioned 'with smudging' that shows smudging results, when I tried rubbing the liner with my fingers.


Cons:
I would love to have it in more color range
If you are looking for creamy or gel liner consistency in your eyeliner, this might not be the product for you. You could try use Gel Pencil Liner by F21 or any other brand.

Where to buy:
At Forever 21 store or online  (US website) here

Because most of the gel pencil and roll on liners I own used to break while applying, I resorted to a gel liner with brush applicator by Rimmel before buying this product. I like Gel eyeliners too. At the same time, I am loving this smooth liner by F21 and will buy it again.

                                                            Pic - Application result with small gentle strokes                                             

Happy with it :) 
Has anyone else tried it or any of the company's cosmetic ranges?
What do you think about this, I would love to read your comments and feedback.

This is not a sponsored post.

With Love
Ssilky Dhillon
Let us treat our natural selves, with what nature has to offer.

Follow this blog
Subscribe to Ssilky Dhillon on Youtube
@ ssilkydhillon on Twitter
@ssilkydhillon on Instagram


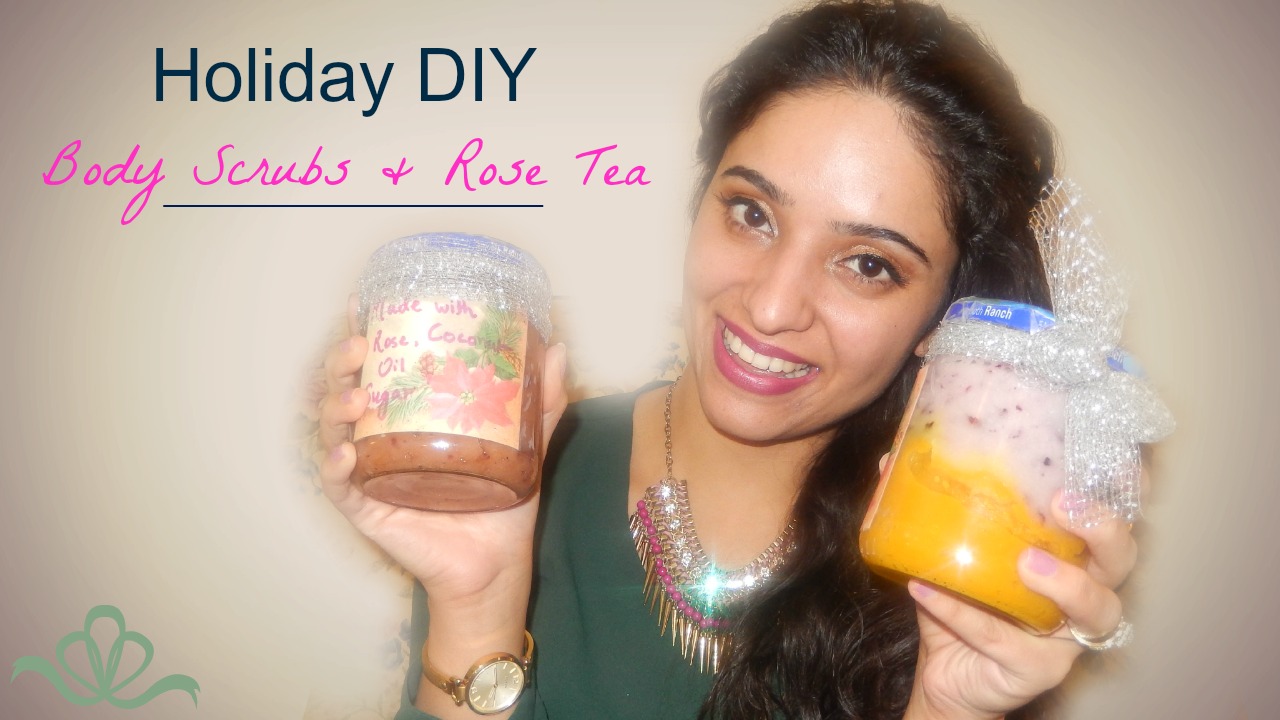
DIY Holiday Gift Ideas | Natural Body Scrub & Rose Tea


Homemade Scrubs and the tea I made are so nourishing with fresh ingredients and also very cost effective. I made some for this Holiday season.

For the tea, make sure you use roses without any preservatives as it is something you would be drinking.
Steps in the making alongwith ingredients:
Dry out rose petals.
I let them air dry naturally at room temperature. It took some 4-5 days.
Mix your favorite tea (optional) I used Earl Grey, grounded cardamom seeds, rose petals and some mint together. Store in airtight container. When prepared, I like to put just little bit in my hot water. And there you have it, yummiest little delicacy you can indulge in this winter.

For the Scrub, I made three scrubs with almost the same basic recipes. It was a rose water scrub, sandalwood and turmeric/tea tree oil scrub.

https://www.youtube.com/watch?v=4833y29Gjkk


Basic Ingredients
1 Mason or Any airtight jar (I recycled and sterilized my old ranch sauce jar)
1 cup sugar (I used white cane sugar; other options - brown sugar)
1/2 cup oil of your choice (I used coconut; other options - olive oil)
Fresh rose petals (if you can get rose without preservatives! even better)

Rose Scrub: 1/4 tbsp rose water, 5-6 rose petals (optional - mainly for aesthetic purposes)
Sandalwood Scrub: Same as rose water and add 1 tbsp sandalwood powder
Turmeric Scrub: Basic Ingredients same and with sugar mix 1/4 cup of turmeric powder and 5-6 drops of Tea Tree Oil.
(You can skip turmeric and simply make it with tea tree oil as well).

Recipe:
Rose & Sandalwood Scrub
Grind rose petals and rose water together. If you want petals intact just tear them with hands. Mix it with sugar and slowly add coconut oil.You need to watch consistency at this stage. If you want a smoother scrub, you could add more oil or vice versa. Mix everything well.

For Sandalwood scrub add powder at this stage and mix well.Store in your jar.

Turmeric Scrub Recipe:
Mix sugar and turmeric together. Add tea tree oil and mix well. Slowly add coconut oil. Mix well and store in airtight jar.


Expiry of Scrub:
These scrubs if kept in airtight jars and do not come in contact with water should last you more than a month. Some say sugar scrubs with oil (coconut or  olive oil) last more than six months. Personally, I run out of mine withing 30-35 days so I can't really put a stamp over it.
If you planning to keep it in your shower, you might want to add preservatives in the recipe.
For rose water scrub I would recommend keeping it in refrigerator. It should be good for more than 3 weeks.

Benefits:
Sugar works for the scrubbing action.
Rose water is good for removal of fine lines and wrinkles. It is anti-inflammatory and opens up your pores.
Tea Tree Oil is again a good antibiotic and has anti-fungal properties. The one I used has Vitamin E too and is by 'Hollywood Beauty'.
Sandalwood provides freshness and is very cool and leaves the skin feeling soft.
Turmeric has antibiotic and medicinal properties.
Coconut oil is very nourishing and moisturizing to the skin.


Important! Please Note:
* I would not recommend using these on face.
* Also if you are allergic to any substance please do not use. In some cases you might need to consult with your dermatologist before using these products.
* Some find essential oils not suitable for skin. It works fine for me, in any other case, please do your research.
* I am not a dermatologist or a skin care professional. These are the products that I have been loving lately.

I am in love with these herbal scrubs. I hope you liked my Christmas DIY gift ideas. Let me know if you are planning for some DIYs too? Would love to be inspired.

Happy Holidays!
:)

This post is not sponsored by any third party, and the products in this post is my real life choices.


With Love
Ssilky Dhillon
Let us treat our natural selves, with what nature has to offer.

Follow this blog
Subscribe to Ssilky Dhillon on Youtube
@ ssilkydhillon on Twitter
@ssilkydhillon on Instagram


Heng Fang Cute Fruit Lip Balm Review

Hello Loves!

Hope you guys are having an awesome weekend. It was all cold and rainy here, so we had some awesome Pizza takeaway Yesterday and Today was a cleanup day for my room and kitchen.

Also Today I received two lip balms from my sister as a gift. First of all I loved the packaging and couldn't resist posting a pic over my instagram. The design of the cap of this balm is of a crayon pencil and I love it. I know I am not a teen anymore, can't help it, it made me happy. I feel like they are worth mentioning so here is a quick review on them.

Fruit Lip Balm

Just look at them aren't they so like a toy. They are literally size of my fore finger..so cute! And they taste of a toy too! haha well seriously its like I have scent of barbie doll on my lips. Yes! I mean the scent of barbie and her hair. It has a fruity flavor. And I am not eating them, in case you are wondering ;).

I have just applied them once and they felt so moisturizing. Both are for dry lips as the package says and my lips are so chappy most times so that makes me love them even more. It is a color change lip balm. When I was a kid, I remember my mom buying those green shades lipsticks which would change color and become from natural shade to a very dark magenta. It was no less than a little magic show for me. And I used to be so excited! Anyways, for this balm, when you apply, it seems like any regular lip moisturizer with no color and in seconds the color is pink. Blue lipstick is a darker pink and green is a light shade of pink. They have a very subtle sheen. Here is a pic.

Fruit Lip Balm
Pic different in different computer settings (shades slight darker than in this pic)

I hope this pic helps, the shades I got are pretty much a dark and a light shade of the same color. I applied it over the wrist as I never wanted my natural lip shade making the color look deceiving.

It lasts pretty long. Basically, for this review I wore it this morning, we had lunch and it was in the eve that I removed it.  So, I could say that it lasts for atleast five hours or more.

It was recommended to my sister so much by her friends that she tried and liked it a lot. And here I am writing this review on it as it really seems a pretty good quality product to me. For the brand its Heart's Love as saw in alibaba.com is Heng Fang. Heng Fang as a company I am aware of as I have read some good reviews over them by beauty gurus. So, I was even more excited to try them. Here is a listing on Heng Fang's website. Incase anyone has tried the label or their lipsticks, let me know in the comments.

Where to Buy:
We got it from a local seller in India. I saw listings over websites that I already mentioned before.
I found some more listings over ebay and amazon for hengfang cosmetics but not particularly this balm. I feel it would be best to buy from stores, if you find them.
In any other case, I would be happy to get one for you and may be ship :-)


Heart's Love Lip Balm

So, here is my final take on it.
Pros: very moisturizing, lasts long, has a very fresh feel and scent, well pigmented for their shades, comes in a cute packaging, and quite good for the price
Cons: You might need to use a good makeup remover as just wiping it of with water or face wash won't work. Also, the smell is little artificial or of a bubble gum to me. So, if you like bubble gums you might actually like the smell of it.

I would recommend this product for I know many who have been using it for sometime and I am loving it by far. Hope you liked my review. Thanks for reading.

If you have any other requests for reviews let me know in comments below.

Happy Holidays!

This post is not sponsored by any third party, and the product in this post is my real life choice.
Here another review of Heng Fang lispticks over youtube.

With Love
Ssilky Dhillon
Let us treat our natural selves, with what nature has to offer.

Follow this blog
Subscribe to Ssilky Dhillon on Youtube
@ ssilkydhillon on Twitter
@ssilkydhillon on Instagram